Showing posts with label paint. Show all posts

Saturday, 13 February 2021

Scrapbook Layout - Explore

Scrapbook Layout - Explore
One of my favourite photo's of Loki, I think the non posed photo's more often than not make the best photo's he was just being himself doing what he does.


The photo and the papers complement each other, the fussy cutting picking out the greys and greens from his hoody and the stencilling, and the papers picking out the the browns from the wood.

The page is made up in 3 layers, firstly the stencilled leaves, using a Finnabair Impasto paint sponged through the stencil onto the base sheet, taking into consideration the placing of the photo and embellishments so that the stencilling can be seen poking out the sides.

Then second layer is the layering of the back papers, different widths and lengths going vertically and horizontally, I distressed the edges of these strips to add more texture to the page.
The die cut leaves are are in this layer too, layered up with the strips again taking into consideration the placing of the photo so that the leaves can be seen.

I take several photo's as I go along of the positioning of things so that when I place them all and am happy I then take them apart and glue them in place but can forget where they were so a photo is great to look at for the gluing part.

The last layer is the photo and the fussy cutting plus the title, the photo is mounted and then I use 3D foam pads so that it adds some height and allows me to be able to tuck things underneath, again I have placed all my pieces on and when I am happy I take a photo to look back on. 
I have placed  a flower under the E of the title using  3D foam pad  to raise it up level with the photo to keep the title level.
Some of the flowers are tucked under the photo and some are overlapping onto the photo and overlapping each other.
Lastly I have added my flower to finish.

Kit available with full instructions and supplies to make this page ... Scrapsnscribblesuk Page Kit


 

Friday, 8 January 2021

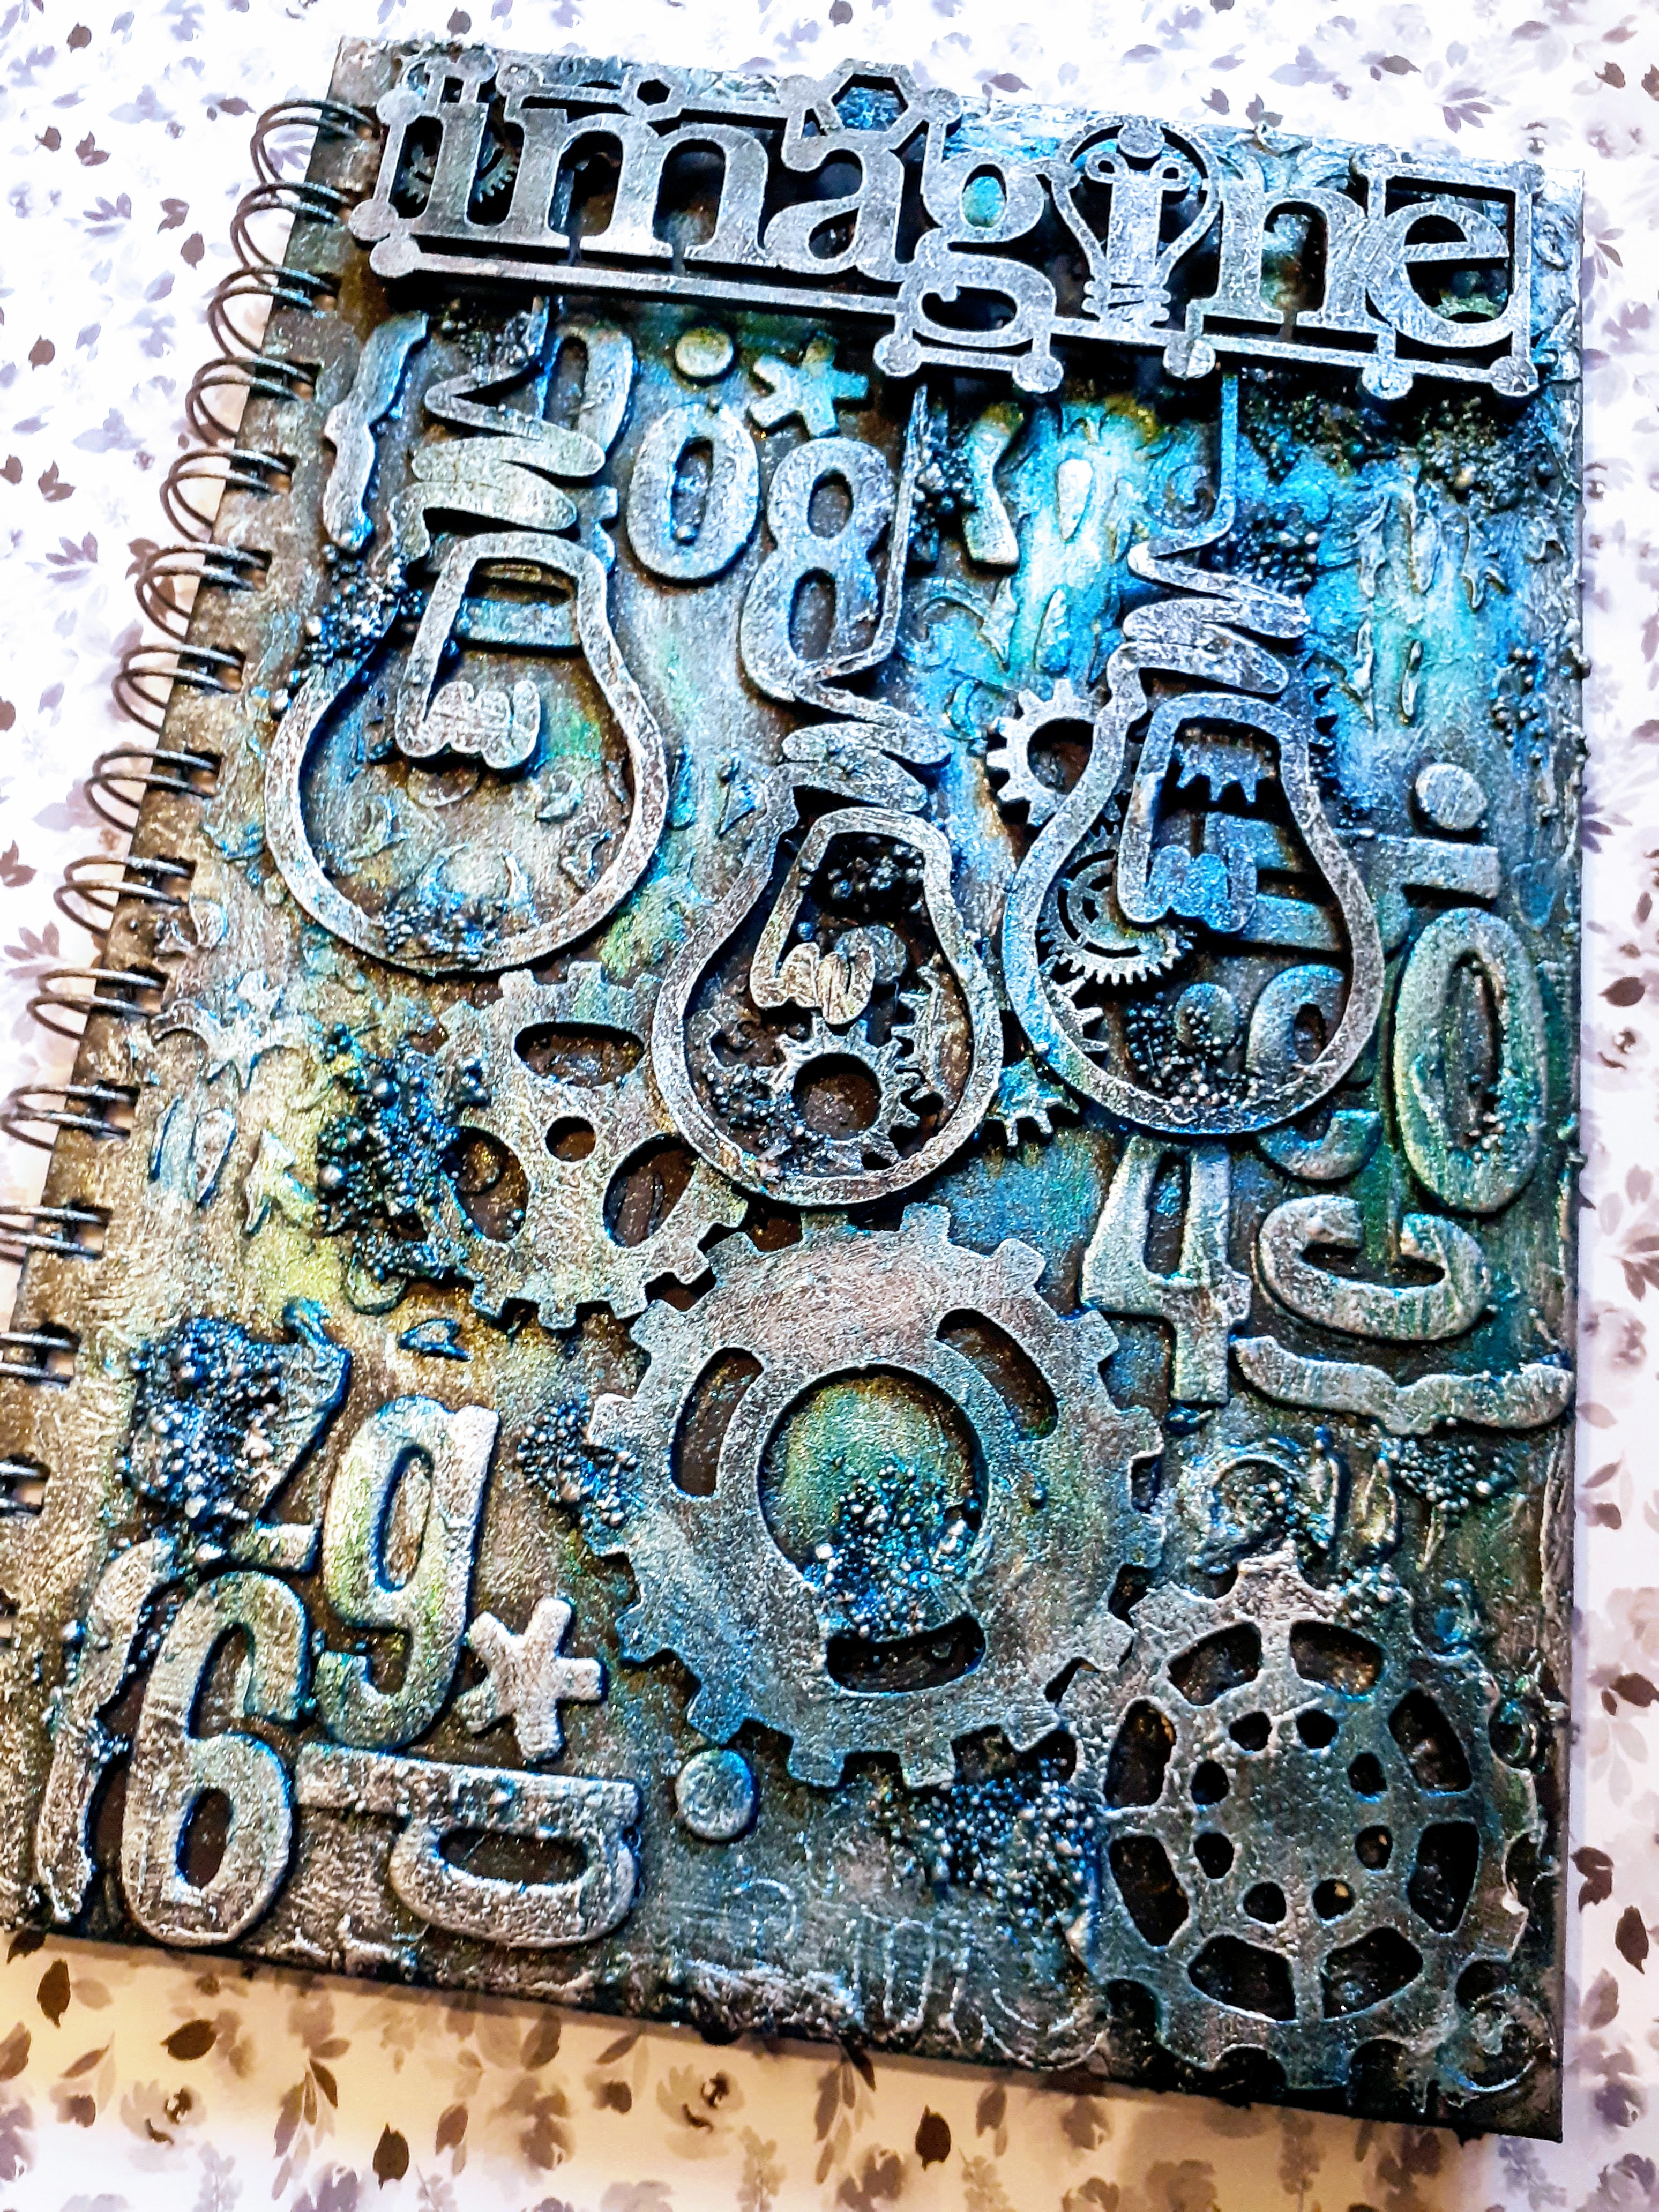
Imagine-Mixed Media Notebook

 And again..... 

a completely different colour pallet and subject to this notebook, not one i would normally do, again just went through my drawers and picked out things .

love the result.


cogs and old leftover alpha letters are a great base for any project and just loving these mdf light bulbs, always reminds of  every time i said light bulb and i would get yelled at LAMP, i would always yell back ..... you don't go in wilkos and ask for a light lamp do you??  this was the life in a theatrical hire company full of technical people...... anyway i digress!!!

again, stencil and paste, the alphas and cogs go on first, i may add just a couple more later when the next layer go on as foundations to hold the next layer steady, when dry all is then painted with black gesso
 the title and light bulbs go on next adding a couple more cogs under the title to make sure it is attached well and secure, more black gesso, i do this on the different levels as it is easier to get everything covered, if you leave it to the end you will find it hard to get to the bottom layer,  some more texture is then added with gel medium and glass glitter and beads, when dry more black gesso and then when all is nice and dry in with the paint and wax, dry painted so pretty much get all the paint off of a stiff paint brush and gently brush over gradually building up the paint, three colours i used , going over with one colour then the next and the next then picking through the colours again until i am happy, you cansee that the black base is still very visible.
lastly i used a silver wax and my finger just picking up the details of the textures.
very happy with my finished project.


Blossom Notebook- Mixed Media

 when your enjoying doing something why stop, really enjoyed the way i made the last notebook, by just opening drawers and picking stuff out so i did it again......

this time a floral theme and completely different colour pallet.


using resin and moulds, stencil and heavy paste, some lace, pearl half beads , seed beads in gel medium to make more texture ,
 then white gesso all over and left to drywell,
 dry brushing with several different colours of metallic paint building the paint up until i am happy with the colours and finishing with gold wax applied with my finger to pick up the texture detail.


Sunday, 3 January 2021

Mixed Media - Dream Notebook

Now Christmas is out of the way and things can slow down a little bit plus back into 
being at home again (tier 4)
maybe i can get back to a little bit of relaxing crafting, i went into my craft room and tidied up a little bit, you know how it gets when your not crafting much and it becomes a dumping ground, well tidied up and started to just look at things, i had found a notebook at work (the Works) and it needed a spruce up so perfect for a getting back to it project.


i just started going through things, found some odd left over letters and numbers so they went on, then i started opening my mdf drawers and found the cogs so they went on,  a hexagon stencil and some paste. then i came across some resin leaves and swirls so they went on, i found some metal stars and pearls half beads, a few more cogs .


when the paste was nice and dry i then used black gesso all over and left to dry again.....
back into the mdf drawers and i found the heart and wings and the Dream title.

lastly i found the resin wings and face so they went on too, all gessod black and left over night to dry and then today i played with paint and  wax
Red, Purple and Orange paints dry brushed on going on with each colour then going back again to the colours and building it up until i am happy with the colour mix but still seeing the black base coming through, and then gold wax applied with my finger, picking up the texture.


Wednesday, 25 November 2020

Holly Jolly Christmas Tag

Holly Jolly Christmas by AB Studio, a lovely christmas paper pack, part of my latest kit from 
this time a christmas tag.


for this project i used.....


from my stash i used,  red acrylic paint, 3d foam pads, clear gesso, gel medium.

firstly i covered my tag with paper from the pack and then i coloured my paste with the red paint and stencilled it onto the back ground.

i  then did some fussy cutting and using the 3d foam pads and gel medium i layered up my design.

i then went over thw whole thing with the clear gesso, when that was all dry i added the glitter paste to the raised stencill on the back ground and the baubles and candy canes.

lastly i watered down some white gesso and some of the red paint separately and splattered all over with both.


Tuesday, 10 November 2020

The Secret Garden

 Loving the Secret Garden Kit from Kits'n'kaboodle and had great fund creating this piece from my kit, plenty left to creat more projects too.


i added lots of cherry blossom to my kit to make my project, stencilling, painting, waxing and this is the result.


Believe in Christmas

 The first of my November projects for Thompsons craft supplies and of course it has to be Christmas themed
and a gorgeous collection from AB studio Holly Jolly Christmas

for this i used one of my pallet wood rustic backgrounds.


for this project i used.....
AB studio stencil tree
pentart metalic wax in green and silver
fabrica decoru magic paint, cinnamon with gold
color glow blue saphire
thompsons craft supplies flower collections
christmas words

from my stash i also used white gesso, clear gesso, some red paint  and a wooden word Believe.


Firstly I stencilled my trees and the snow flakes and fussy cut some from the gold foiled sheet when it was all dry i covered it all except the gold foil with clear gesso.
i used my magic paint, ble saphire and then my waxes to coour my back ground.

I then fussy cut lots of the elements from the extra sheet in the paper pack and some of the larger poinsettia from one of the sheets in the pack.
next I backed my reindeer to give him a bit of strength and then layered up my paper elements, painted them all with clear gesso to add strength .

I painted my wooden word believe in red and added my title and layered up round it.
I then added my flowers and lastly splattered with watered down white gesso. 


Wednesday, 14 October 2020

Follow your Heart - Scrapbook Layout

Follow your heart scrapbook layout
these papers are just my subject and colourways, just love them, and when you love something it makes it very easy to create with them, and this set did just that.

My DT kit from Thompsons craft supplies for October 
i need to get these done before i go away on my weeks sewing retreat with friends 
(if restrictions allow, watching the updates constantly!!)
and this range is making it very easy to do that.


for this project i used......
13arts end of summer A4 sticket sheet
13arts end of summer stencil - sunflowers
 finnabair sparks acrylic paint - pheonix feather
finnabair art alchomy wax -  firebird
Tim Holtz idea ology words
Hobbilicious mdf leaves
Thompsons craft supplies flower collections

from my stash i also used clear gesso

my how to....
i started by painting my whole background sheet with clear gesso, 

when this was dry i sponged through my stencil with the acrylic paint.
i mounted my photo on some white card stock and placed in just above centre using 3d foam pads and 3d gel
i chose and fussy cut my paper elements and painted with clear gesso,
i then placed them all to see how my arrangement would sit, when i was happy i took a picture to refer back to , took it all apart and started to glue it all in place using 3d foam pads and 3d gel for the paper elements and the 3d gel for the mdf leaves.
starting with the mdf leaves i built it up finishing with the paper flowers.
i then added my title.
i covered my photo and splattered with water down acrylic paint.