Showing posts with label art journal. Show all posts

Wednesday, 26 May 2021

Summer Journal

 Summer Journal, 

using the Sunkissed range by Cocoa Vannill Studio from 

The Mad Scrapper

I'm getting ready for Summer, waiting patiently!

I created this fun and easy journal just waiting for all the photos and stories of our summer.
A very easy to make project.

Starting with 12x12 sheets from the range I cut them, leaving them mainly 12" wide but cutting down to 7 or 8" deep and then folding in half and using the cut off pieces too so nothing goes to waste.


I then placed then together, deciding which colours and designs I liked next to each other and mixing the sizes, adding the smaller in between the larger, you can even trim some off so the widths are slightly different too, to see things poking out make for a much more interesting finish.
when I was happy with the way I had the pages, I then fixed them in place with a long reach stapler and then bound with some ribbon and tied on the outside.

I decorated my cover using the cut apart sheet, layering pieces up and using some 3D foam pads to add some height, from my stash I found some bobble ribbon which I added to the edge of one of my inside pages and to my cover, tucking it under the main title cut out.


I have then decorated the inside with some of the pieces from the ephemera pack. and any leftover strips from my page cutting .

It's now ready to add my photos and journaling as we go through the summer, a great project to take away with you if you have a portable photo printer, some of the ephemera, the cut apart sheets, some journal blanks and some glue and you are good to go. 


using the just gorgeous Sunkissed range, I used 12x12 sheets, 


Tuesday, 30 March 2021

Mini Album/Journal.

 Handmade journal/ mini album

next DT project for The Mad Scrapper

oh I love a mini album.


I love it when I get some packaging like this, it's the perfect size and already in the perfect shape for a mini album, one of my favourite things, I love them for an event when you have quite a few photos to document, there is an end to it so it becomes complete.


For the outside and inside I cut the pieces for the flat surface and attached them with a strong double sided tape and then cut the spine pieces, measured and scored where I needed the folds to be but made sure they were wider so they overlapped the main pieces, on the front panel I added the extra red coloured strip just to add a bit of interest, again fixing the spine covers in place with a strong tape, right up to the edges so there will be no lifting.

I distressed all-round the edges of the book with a sand paper block, it just softened the edges a bit.


I added my elastic for my inner pages by punching holes and threading the elastic through and back again, tying a knit at the bottom.
The pages are just 12x12 cardstock cut to size and folded in half, they then tuck under the elastic, you can add more pages as and when you need or add different sizes for more interest, the pages can be removed to work on for ease and then added back in when finished.

For the outside design I cut some of the pieces from the playing cards sheet and layered them up with my metal leaf, die cut flower, embellishment cluster and my title. I used 3d foam pads and gel mediums for my glues adding height to the design.
Lastly, I splattered using the oxide ink watered down and using a paint brush to splatter.

On the inside I cut a pocket and with a strong double-sided tape I fixed in place, i then did some fussy cutting from the splendor sheet and glued it in place just poking out of the pocket, i made myself some little tags and cut some elements from the playing cards sheet and tucked them in the pocket, you could add another pocket on the inside back cover the add more bits and pieces from the set so they are to hand when adding to your mini book, embellishments ready to go.


products used.....

Paisley and vine papers

from my stash I also used ....
Bramble Fox Perspectives
Embellishment cluster
Metal leaf 
Flower die cut piece

Friday, 8 January 2021

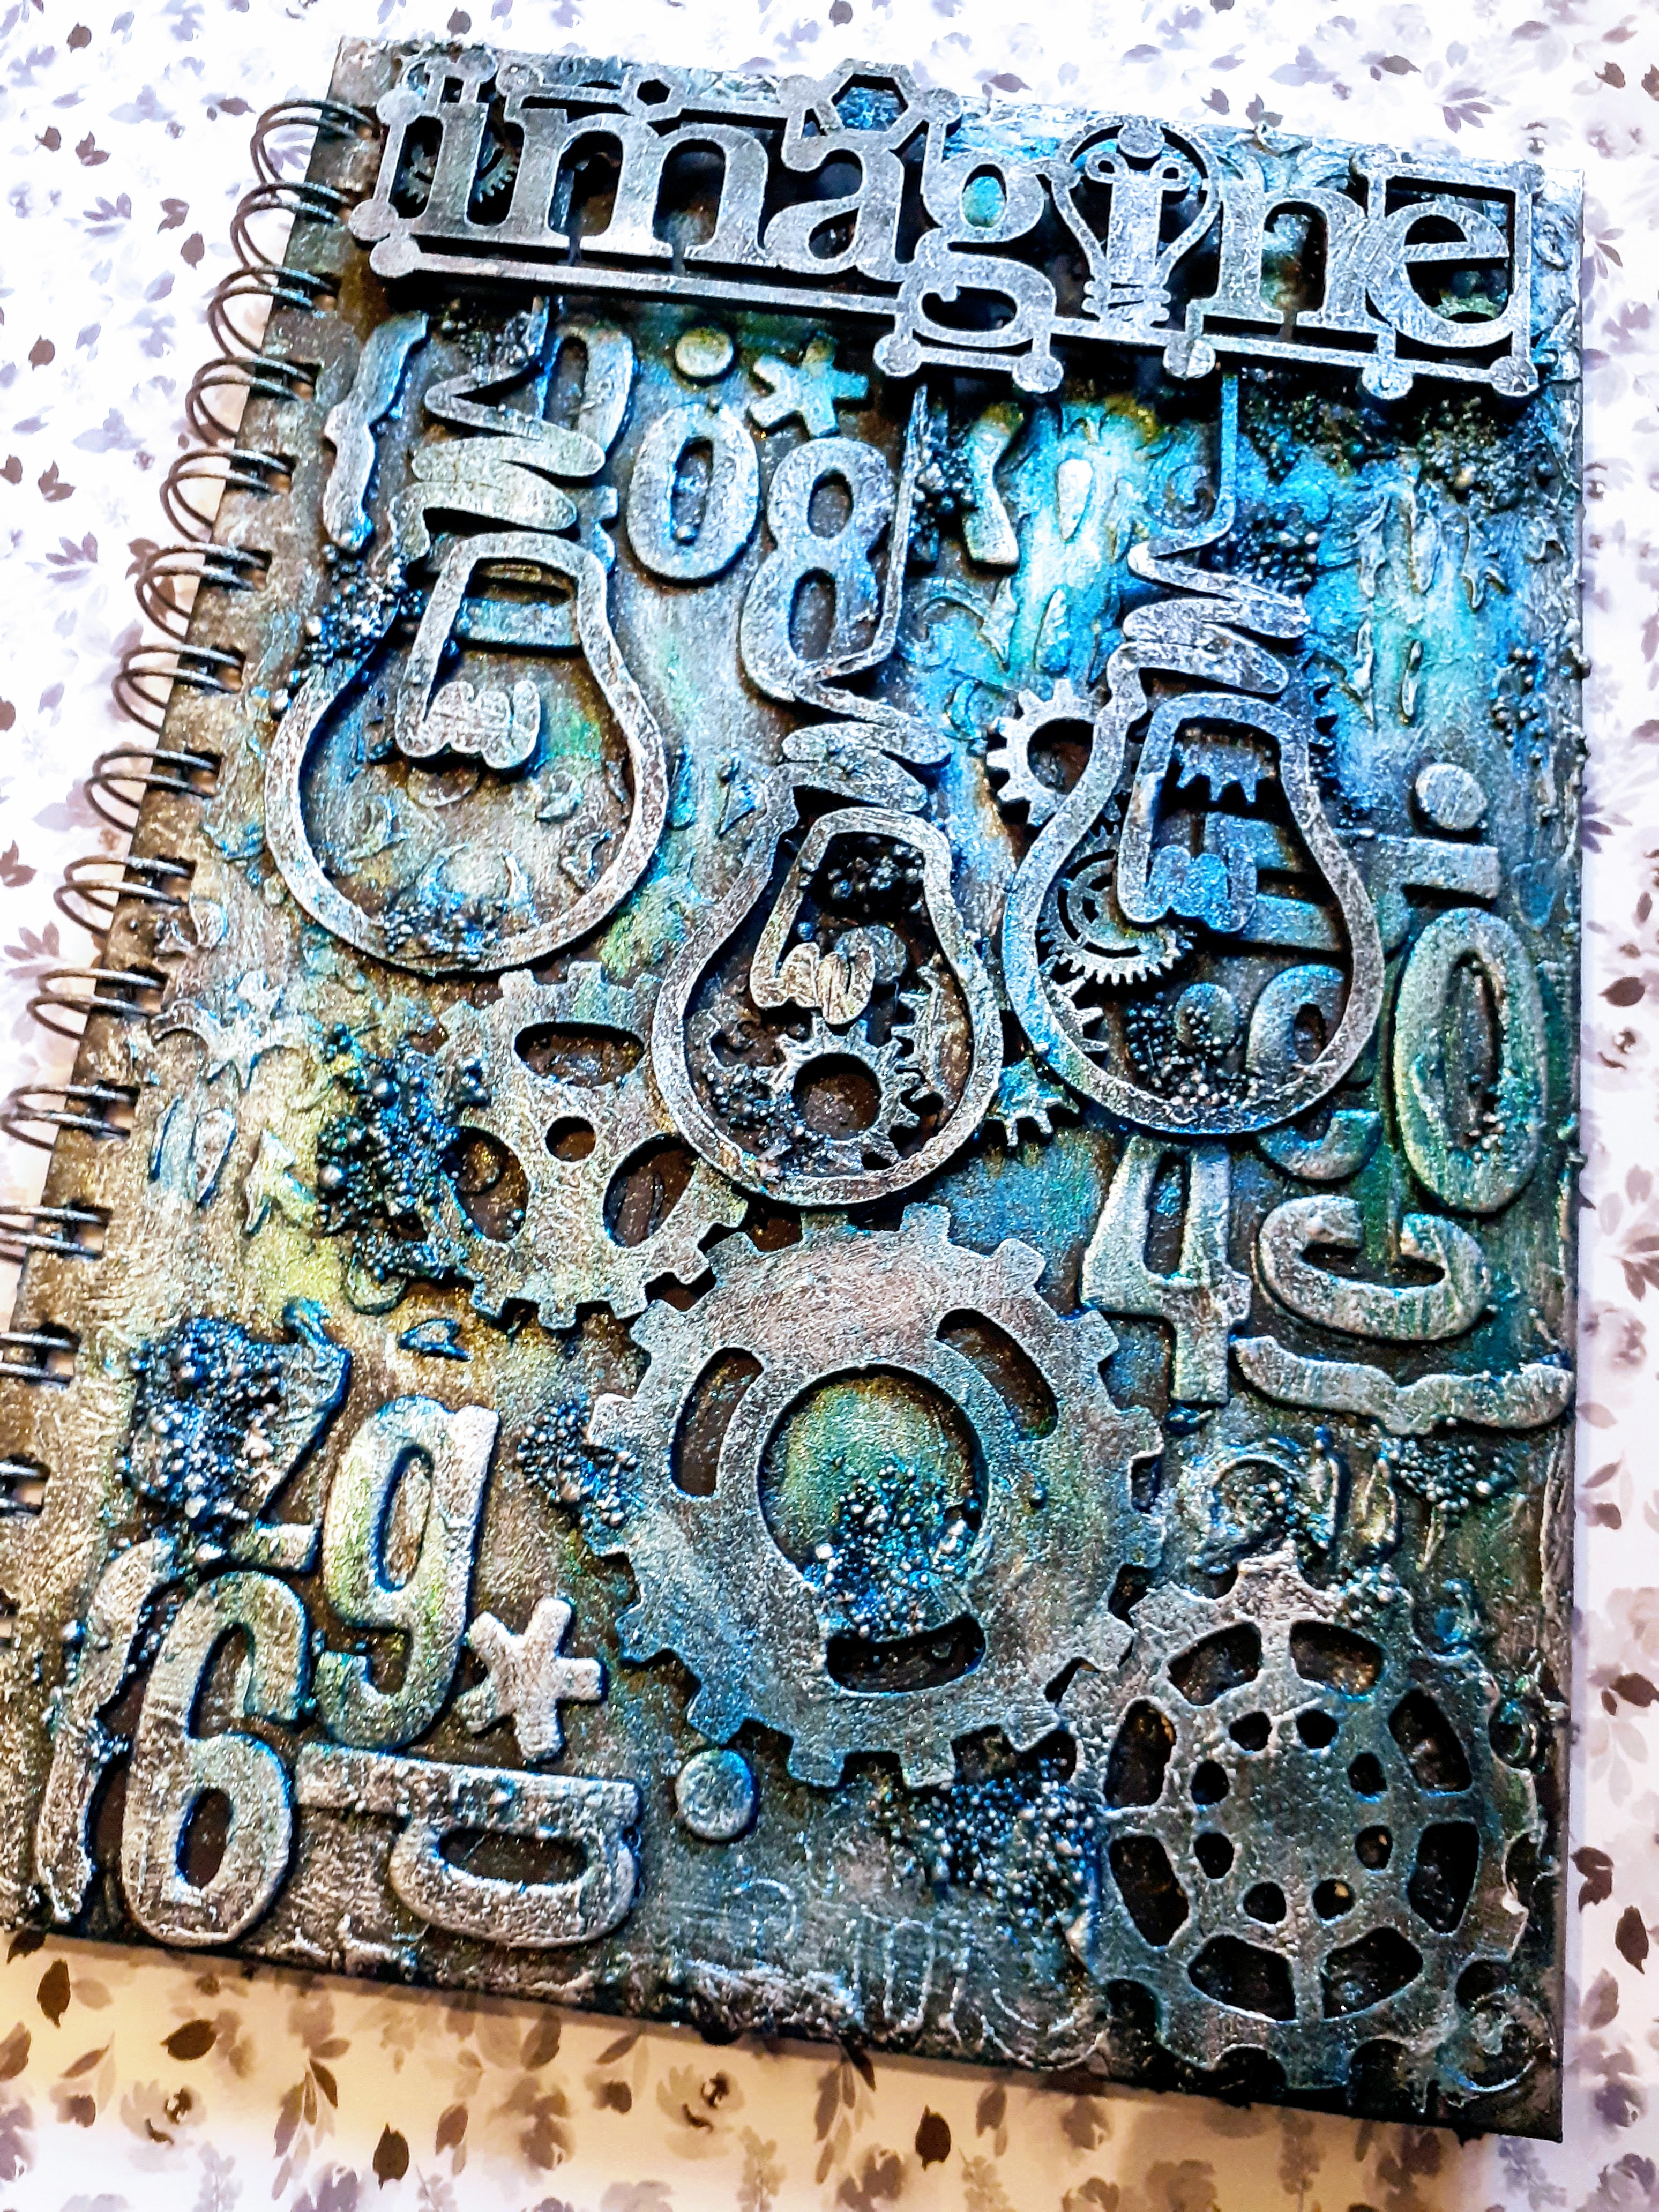
Imagine-Mixed Media Notebook

 And again..... 

a completely different colour pallet and subject to this notebook, not one i would normally do, again just went through my drawers and picked out things .

love the result.


cogs and old leftover alpha letters are a great base for any project and just loving these mdf light bulbs, always reminds of  every time i said light bulb and i would get yelled at LAMP, i would always yell back ..... you don't go in wilkos and ask for a light lamp do you??  this was the life in a theatrical hire company full of technical people...... anyway i digress!!!

again, stencil and paste, the alphas and cogs go on first, i may add just a couple more later when the next layer go on as foundations to hold the next layer steady, when dry all is then painted with black gesso
 the title and light bulbs go on next adding a couple more cogs under the title to make sure it is attached well and secure, more black gesso, i do this on the different levels as it is easier to get everything covered, if you leave it to the end you will find it hard to get to the bottom layer,  some more texture is then added with gel medium and glass glitter and beads, when dry more black gesso and then when all is nice and dry in with the paint and wax, dry painted so pretty much get all the paint off of a stiff paint brush and gently brush over gradually building up the paint, three colours i used , going over with one colour then the next and the next then picking through the colours again until i am happy, you cansee that the black base is still very visible.
lastly i used a silver wax and my finger just picking up the details of the textures.
very happy with my finished project.


Blossom Notebook- Mixed Media

 when your enjoying doing something why stop, really enjoyed the way i made the last notebook, by just opening drawers and picking stuff out so i did it again......

this time a floral theme and completely different colour pallet.


using resin and moulds, stencil and heavy paste, some lace, pearl half beads , seed beads in gel medium to make more texture ,
 then white gesso all over and left to drywell,
 dry brushing with several different colours of metallic paint building the paint up until i am happy with the colours and finishing with gold wax applied with my finger to pick up the texture detail.


Sunday, 3 January 2021

Mixed Media - Dream Notebook

Now Christmas is out of the way and things can slow down a little bit plus back into 
being at home again (tier 4)
maybe i can get back to a little bit of relaxing crafting, i went into my craft room and tidied up a little bit, you know how it gets when your not crafting much and it becomes a dumping ground, well tidied up and started to just look at things, i had found a notebook at work (the Works) and it needed a spruce up so perfect for a getting back to it project.


i just started going through things, found some odd left over letters and numbers so they went on, then i started opening my mdf drawers and found the cogs so they went on,  a hexagon stencil and some paste. then i came across some resin leaves and swirls so they went on, i found some metal stars and pearls half beads, a few more cogs .


when the paste was nice and dry i then used black gesso all over and left to dry again.....
back into the mdf drawers and i found the heart and wings and the Dream title.

lastly i found the resin wings and face so they went on too, all gessod black and left over night to dry and then today i played with paint and  wax
Red, Purple and Orange paints dry brushed on going on with each colour then going back again to the colours and building it up until i am happy with the colour mix but still seeing the black base coming through, and then gold wax applied with my finger, picking up the texture.


Wednesday, 18 November 2020

Journal - Holly Jolly Christmas

 Christmas journal double layout using Holly Jolly Christmas by AB studio, a DT project for Thompsons craft supplies.


.for this project i used......

thompsons craft supplies flower collections

lots of fussy cutting, the tags, wreath and lots of other bits.

from my stash i used some ribbon some red acrylic paint,3d foam pads, 3d gel medium, clear gesso.

i cut my background papers to size and distressed the edges with open scissors (whoops be careful)
 i stencilled some red paint on through the stencil we used for the recent retreat.

i cut out 2 tags from one of the sheets and punched the holes out and added my ribbon.
then it was simply fussy cutting and layering, the different elements.
layering using my 3d foam pads and 3d gel medium to gain the height.
i added some paper flowers and lastly i splattered with watered down red paint.
got to love the splattering.


Wednesday, 2 September 2020

Till We Meet Again -Journal Layout

Last of my Designs from my August Dt kit From Thompsons craft supplies
the gorgeous Till we meet again papers.

Travel the world over to find the beautiful,
Till we meet again.


quite a clean and simple page for me, i just love the papers and didn't want to lose them in all the grunge and product.

for this project i used.....
p13 Till we meet again papers
pentart cracking paste and primer
Tim Holtz ideaology chipboard quotes
Finnabair micro beads

just love gates and doors so i didnt want to cover them, 
i cut my papers to fit the pages in my journal, on the left just edged with the primer and paste and then added my first part of the title.

on the right i again edged with the primer and cracking paste, 
i added my distressed door , edged with the micro beads
added the fussy cut elements, layered them up and added the second part of my title.